This term simply indicates that you or the system can increase locally the number of grid points and therefore higher the precision of the 3D model. This should be done, for example, in some areas where the curvature of the model is too high, or where there are too many constraints. To give a simple indication, more than one constraint per cell is far too much !!!
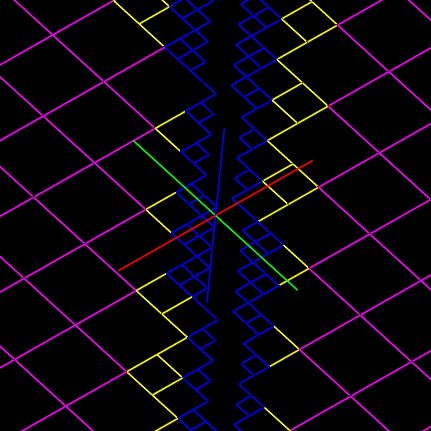 Currently, there are two different situations where the grid resolution can be changed. At first, when setting discontinuities, the user doesn't want too much aliasing along them because of the coarse resolution of the grid. The system adapts automatically the resolution along position and normal discontinuities to minimize this effect, as shown in the right-hand side figure. A position discontinuity is shown on a simple plane. The purple grid is the original grid, whereas the other cells where either deleted because of the discontinuity, or subdivided like the yellow or the blue ones.
Note : this doesn't happen for the fairing curve, that is not a discontinuity
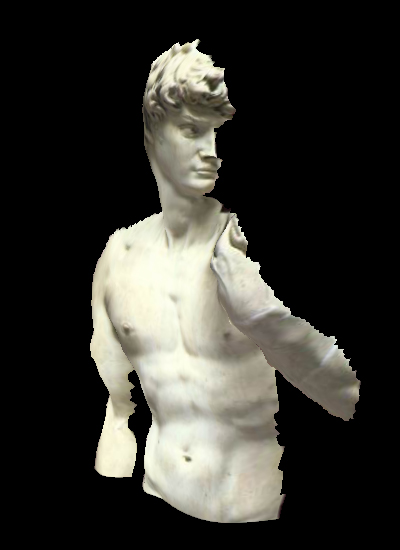
 Another very simple case involving resolution modifications : building a model from a close-up image. There will be quite often a foreground – the object – and a background, which is not interesting and doesn't need to be built precisely, whereas the object has tricky details. This time, the user can lower the resolution in the background area and raise the resolution where he wants some more details, just as shown in the right-hand side figure.
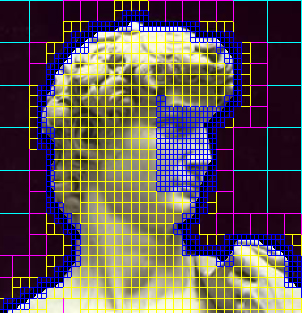
To get a model of the David, the resolution has been raised in the area containing the nose and the eyes ; the resolution remains coarse in the background. The initial resolution is the purple one.
The head is separated from the background by a position discontinuity ; you can see that the system has automatically raised the resolution along this border line.